Saturday, July 7, 2012

Vegetable Rice (Pulao)


Vegetable Rice (Pulao)

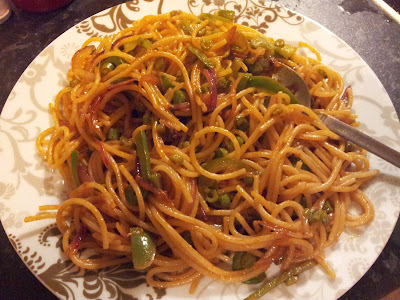
Well sorry for the terribly bad pic, but I was hungry :)

However I must admit that this is the easiest, fastest cooking and filling vegetarian dish. Cooked across India in almost every household. This is more than often also considered as food for the not so rich people in India. Nonetheless you will find vegetable pulao in the costliest restaurant with various add-ons, and a wonderful taste. 

Hope you enjoy making and eating this dish as much as I do. 

Ingredients: 
1 bowl basmati rice
1 onion (medium size) shredded into long threads
2 tomatoes (medium size) cut into long pieces
3-4 medium sized potatoes cut into 8 pieces each
1/4 of cauliflower cut into medium sized pieces
1 Indian Bay Leaf - Large
Cooking Oil - 3 table spoons
Cumin Seeds (Zeera) - 2 tea spoons
Turmeric - 2 tea spoons
Dry coriander powder - 4 tea spoons
Red Chilli Powder - 3 tea spoons
Salt - 5 tea spoons or to taste
Water

For the final touch
Ghee - 2 table spoons
Ginger - 2 table spoons of long thin threads
Garlic - 1.5 table spoon of thin slices
Fresh coriander finely chopped


Method: 
Soak rice in water and keep aside for 15 min.

Take cooking oil in a Pressure Cooker and heat it. When the oil is hot, add cumin seeds. Then add onions and stir fry till they are golden brown. Now add tomatoes, cauliflower and potatoes and mix well. Now add all the spices, and mix. 

Now drain the water out of the rice, and add rice. Mix gently at this stage, as the rice can break if hit too hard. Add 1.5 bowl of water. Mix again. 

Close the lid of the pressure cooker, and cook on high flame till you get two whistles. The moment you get two whistles, remove the cooker from the flame or hotplate, and let the steam take its time to release completely. 

When done, open the pressure cooker and ensure rice is cooked. 

Now take another pan and heat the ghee in it. Add the ginger, garlic and fresh coriander and heat for 1 min. Pour the mixture on top of the vegetable pulao and serve hot. 

Tip: Served with coriander chutney, curd or raita and poppadums. 


Sunday, July 1, 2012

Coconut Chutney


A long pending blog from my side. Finally today I got some free time to write about one of the best chutney's in the world. The south Indian 'Coconut Chutney'. :) 

I haven't made this totally as a South Indian would do, and have added a little flavor from my own kitchen ;)

Ingredients: 
1 cup of coconut powder
1 large tablespoon roasted gram
Salt - 2-3 tea spoons
Curry Leaves - 10
Fresh Coriander (1 large table spoon) - Optional
Mustard Seeds - 2 tea spoons
Cooking Oil - 2 tea spoons
Water - 3/4 glass

Method: 
Take the coconut powder, roasted gram, curry leaves, coriander (optional) and water in a mixture/grinder and grind the chutney to a smooth consistency. You can choose to increase or decrease the water content as per your liking, however I try to make the paste neither too thick nor too thin. 

Now take a pan and heat the oil. When the oil is heated, add the mustard seeds. When they splutter add few more curry leaves, and finely add the chutney to it. There is no need to heat the chutney, so at this step put down the flame. 

Mix the chutney well, and transfer to a ceramic bowl. Refrigerate for 30 min, and serve with south Indian dishes like Dosa, Uttapam or Idlis :) 

Saturday, June 30, 2012

Bread Rolls


 Bread Rolls


One of the simplest and the yummiest snack. Bread rolls are relished by every household in India, and I thought of sharing this recipe here for my world-friends who might not have tasted this :)


Ingredients: 
3 large boiled and mashed potatoes
1 large onion finely chopped
2 green chillies finely chopped
200 gm of fresh chopped coriander
Salt - 4 tea spoons
Red Chilly powder - 1/2 tea spoon
Coriander Powder - 3 tea spoons
Cumin Seeds - 1/2 tea spoon
Garam Masala - 1 tea spoon
Cooking Oil - For deep frying
Sandwich Bread - 9 slices
Water - 2 bowls

Method: 
Keep the oil, water and bread aside. Mix all the other ingredients in a bowl and mix well. 

Now soak one slice at a time in water and then press the soaked bread nicely in between your palms. Then place 1 or 2 table spoons of potato mixture in the centre of the bread in an oval shape. 


Neatly tie the bread around the potato mix slowly pressing from all sides with your hands. Make sure that the bread completely closes on the potato mix. It is important to completely seal the bread roll, else the potato comes out while frying. 


This pic shows how it looks while you are trying to roll the bread around. You can see that at some places it is still a bit open. You can gently pinch these areas of bread and close them. 


This is how a sealed bread roll looks. Prepare 3 bread rolls at a time, and heat cooking oil in a deep pan on high flame. 


Be very careful while putting the bread rolls in the hot oil. Sometimes the oil starts to splinter if by chance any bread roll is opened a bit. Don't be scared if that happens and carefully roll over the bread roll in the oil. For this reason i like to keep just sufficient oil while deep frying, so that the bread rolls have a little portion exposed to the air.


                                                                                Roll over gently and fry uniformly from oil sides. Take the rolls out on a tissue paper to get rid of extra oil (considering it already has so much of oil in it ;) )


Bread rolls are ready :) and taste yum with tomato sauce and hot tea. 


Sunday, June 17, 2012

Mushroom Pasta

Unfortunately I did not save the pasta to be able to take a pic of the same, and show you how wonderful it looked, however I will share the original recipe link over which I improvised a bit more. 


http://www.gojee.com/food/recipes/tomato-oyster-mushroom-pasta-primavera-vegetarian


To this recipe, I just added half an onion, and one fourth of finely diced red bell pepper.


Rest just follow the original recipe as it is. I didn't have basil leaves, so I rather used finely chopped fresh stems of coriander. 


The whole thing just tastes absolutely wonderful.


Update: 1st July 2012
Second stint with mushroom pasta :)


Experience learning tips:
It is best to keep coriander low or rather use basil, otherwise coriander overpowers the taste. 

Sunday, April 29, 2012

Bean Burger

The 'Bean Burger Story' :)


Well I woke up today morning, and just didn't want to have the usual breakfast. I didn't even know what I wanted to cook. All I had in the refrigerator was some boiled beans from the day before. 


Thought of the burgers and I decided to make my own burgers - with no potatoes. (Considering I am spending so much of my time at the fitness world these days in a hope of losing some weight ;))


Well rather than calling them ingredients, I would just tell you what I had and what I did. 


For the tikki - 


Half large onion - finely chopped or grated. 
Half a bowl of finely chopped mushrooms
Three green chillies - finely chopped
Fresh Coriander - Half bowl - finely chopped
A large bowl of boiled beans ( I had boiled beans yesterday with chopped ginger, crushed garlic, a pinch of asafetida and salt to taste)
Half bell pepper - Finely chopped
Two carrots - finely chopped
Two hamburger buns - crumbled to bread crumbs
Two large table spoons of semolina flour (sooji)
Oil - Two table spoons
Salt - To taste
Red Chili Powder - To taste


Method: 
I took a pan and heated the two table spoon of oil at medium flame. 
Then I added the shredded onion, and fried them till they were golden brown. Then i added the chopped mushrooms. Then I added the green chill and coriander. Cooked this for 2 min, and then added the beans. At this stage i let the mixture dry up a little bit, and kept stirring continuously so that it doesn't burn. Then I added the semolina and bread crumbs. At this stage, I added salt and pepper and stir fried for another minute. Finally I added the chopped bell pepper and carrots and  removed the mixture from the flame. 


To make the tikki, I took another 2 table spoons of semolina in a flat dish. Then once the above mixture cooled down I took the mixture in little portions, and made small balls. Finally pressed these balls a little and wrapped them with semolina. The mixture is delicate and so had to handle it bit carefully. Finally a shallow fried the tikki(s) on a flat tawa. 


For the buns - 
Sliced onions into thin concentric circles
Slides tomatoes into thin discs
and sliced some cucumber
Sliced the hamburgers into halves, and fried them on a non stick pan. 


Finally served the burgers with sauce and tea :) 


I loved the whole dish, and hopefully you will love this too. 

Sunday, April 22, 2012

Vegetarian Pizza

Finally I have found the easy and the best suited (to my taste) recipe of making a quick vegetarian pizza at home. 

What you need to make this recipe: 

Pizza Dough:
All purpose flour (3 and a half cups) - Makes 4 medium sized pizza
3/4th cup olive oil (or refined oil)
Yeast - 3 tea spoons
Sugar - 1 tea spoon
Hot water - 1 and a half cup

* All the below quantities will be sufficient for 3 pizzas. We will make 1 pizza with zucchini and two with capsicum(green bell pepper). The rest of the toppings remain same. 

Tomato Sauce:
Tomato Puree - 1 can
Tomato Sauce - 2 table spoons
Chilli Sauce - 1 table spoon
Oil - 2 tea spoons
Oregano - 2 tea spoons
Salt - 1 tea spoon

Pizza Toppings: 
Mozzarella cheese - shredded into thin threads
Onion - 2 large onion finely sliced into thin circles
Tomato - 5 finely sliced into thin circles
Zucchini - 10-12 thin circular slices
Capsicum - 10 thin circular slices
Mushrooms - 1 bowl thin slices

Pizza Base: 
Dry all purpose flour


Method: 

Mix the yeast and sugar in the hot water and leave for 5 minutes. You will see that the water becomes milky and the yeast begins to ferment. Adding the sugar helps the yeast ferment faster. 

Meantime take the 3 and a half cup flour in a big bowl, and make a hole in the centre of the flour. Then pour the fermented yeast and oil in the flour. Take a butter knife and start moving it across the flour in a cake cutting fashion. You will see that the flour immediately binds together. Take 2 drops of oil in your hand and knead the flour nicely. One way to test that the flour is done is to make it into a round ball, and then press with two fingers gently on the flour ball surface. If the surface bounces back, the flour is done. Put the flour in a bowl and seal the bowl with cellophane from the top. Leave the flour to ferment for 2 hours. 

When the flour is ready, start with preparing the sauce. Mix all the contents mentioned above in a bowl, and the sauce is ready. 

Now take out the flour and knead again for around 5 minutes. Divide the flour into 4 equal portions. Pack one portion in the cellophane sheet and keep in the refrigerator. This can be used for the next time. Also turn on the over at this time (200 degree centigrade) and pre-heat for 15 minutes. 

Now put some dry maid (all purpose flour) on the surface of the kitchen table and start rolling out the pizza using a roller pin. Roll it out into a large circle keeping in mind that it is uniform in thickness throughout. When the pizza base is large enough, I stop using the roller pin, and flatten out the base more using my hands and fingers. 

Spread 1/3rd of the pizza sauce uniformly on the pizza base. Add a thin layer of pizza base. Cover with onion, zucchini (or capsicum, or both), tomato and mushroom. Finally add another generous layer of cheese on the top. Sprinkle salt on top of the pizza as per taste. 

Place the pizza in the over and bake nicely till the top of the pizza is golden brown and the base is nice and crispy. 

Serve hot with hot coffee or tea :) 

Tip: Add oregano and chill flakes while eating for that extra taste. Don't make it too spicy if you have acidity problems. Zucchini pizza is specially good to curb acidity issues. 


Saturday, April 21, 2012

Saag

Spinach/Sarson Curry (Saag)


I had this amazing dish at a Pakistani Restaurant at Flensburg in Germany. I couldn't stop myself from trying it and within the next three days of my birthday dinner, I tried this at home. 


Absolutely simple and fantastic dish, specially for those who like saag. 


My recommendation would be to use sarson, however for Indians living outside india, just buy two packs of frozen spinach with cream. I used two packets of 'Luksus grønt' spinach to make this recipe. 


In case you are using fresh spinach or fresh mustard leaves, wash them thoroughly and then chop them into fine strips. It is best to leave a little leafy texture to this recipe. It just enhances the taste. :)


Ingredients


Spinach with cream - 500 gram
Onion - 1 big sized
Tomato - 1 big sized
Crushed Ginger - 1 table spoon
Crushed Garlic - 1 table spoon
Cumin Seeds (Zeera) - 2 tea spoons
Salt - To taste
Red Chilli Powder - 2 tea spoons
Garam Masala - 1 tea spoon
Ghee - 4 table spoons


Method


Peel the onion and grind the onion and tomato to a fine paste in a mixer or food processor. Keep aside.
Heat 2 table spoons ghee in a non stick pan, and add cumin seeds to the hot ghee. When the seeds have crackled, add the onion-tomato paste to it and stir fry till the mixture is golden brown. If you feel that the mixture is sticking to the base, add more ghee to it so that it doesn't burn. 


Cook for 2 minutes, and then add the spinach with cream to the pan. I had the frozen packets so it took no time for me to prepare for this dish. If you are making this dish with fresh spinach or fresh sarson, then you will need to take out some time, prior to cooking, for cleaning and shredding the spinach or mustard leaves. 


Cover the pan with a lid and let the spinach-cream mix cook on a low flame for 15 minutes. Keep checking in between to ensure that the spinach is getting the right consistency. If you feel that you need more cream you can add more fresh cream to the recipe. After 15 minutes, add salt, red chill powder and garam masala. 


In another small pan take two table spoons of ghee, and heat it. Add the crushed ginger and garlic paste to the ghee and stir fry for 1 minute. Pour this mixture on top of the spinach and mix nicely. Cover the lid of the pan (with spinach) so that the aroma is sealed into the dish. 


Serve hot. Best with naan and zeera rice. 


Tip: To add to the aroma of the dish, add a little cottage cheese (paneer) while serving on top of the dish. 


Sayantani Style Gobhi Masala


 I learnt making this lovely dish from my friend  Sayantani. With a very north East Indian food quality, this dish is best served with yellow dal tadka and zeera rice. 

 Ingredients
Cauliflower - 1 large piece
Onions - 2 large 
Potatoes - 4-5 medium sized
Tomato - 1 large

Salt - To taste
Panch Phodan - this is a special mix of spices from Kolkatta and can be easily made at home. (Check here for more details)


Turmeric - 2 tea spoons
Red Chilli Powder - 1 tea spoon
    Dried Coriander Powder - 3 tea spoons
   Garam Masala - 1 tea spoon
   Oil - half a bowl


Method


Pluck big flowers out of the cauliflower. Please do not use a knief. Simply pluck the flowers (big around the size of a tennis ball) and place aside. 

Heat around 4-5 table spoons oil in a large shallow frying pan such that you can spread the flowers around the vessel. Place the flowers one by one in the hot oil and let it fry slowly. Keep checking on the flowers and turn them on all sides so that the flowers cook uniformly from all sides. While making this dish I sometimes feel that the flowers are little burnt however it only adds a smokey flavor to the end product. While the flowers are frying, prepare the other ingredients.

Peel the potatoes, and cut each potato into 4 pieces. Keep them aside. Also puree the one tomato and keep aside. Finally shred the two onions into thin long threads and keep these aside as well.

By now the cauliflowers would be done. Take them out piece by piece and place on a tissue paper to get rid of the extra oil. Then fry the potatoes in a similar fashion.

When the potatoes and done, take them out on a tissue paper. Finally add another table spoon of oil to the same pan. Add 2 table spoons of panch phodan to the hot oil. When it is crackled, add the onions. Fry the onions till they are brown, and add the puree. When the puree starts leaving a little oil, add turmeric, chill powder, coriander powder and garam masala. Stir for half a minute and add the cauliflower and potatoes.


It is important to ensure that the cauliflowers do not break into small pieces. So as the dish starts to cook, the vegetables will become more and more tender. So handle it with more patience towards the end. Cover the vessel with a lid and cook on low flame for approximately another 5 minutes. 

The gobhi masala is ready :) Enjoy :)

Tip: My picture shows that peas inside the gobhi, but please don't add those. It simply spoils the whole taste. Make it simple and it comes out very nice. 

Hope you like it. 


Friday, March 16, 2012

Masale ke baigan


Masale ke baigan (Spiced aubergines)


Aubergines/Brinjals/ Baigan (hindi) -> you call it by any name. This is a plant native to India and is very rich in Iron. Its a rich source of folic acid and potassium, and is helpful in treating high blood cholestrol. Very famous all across India, brinjal can be cooked in various dishes. The taste and variety of the dishes varies widely between north and south India. What I have discussed in this blog is the recipe used across the northern Indian states such as Punjab, Uttaranchal, Himachal Pradesh, Uttar Pradesh and the National Capital Region.


Ingredients


Small sized aubergines - 6 to 7 in number
Coriander Powder - 3-4 table spoons
Garam Masala - 1 table spoon
Mango Powder (Amchur) - 1 table spoon
Red Chilli Powder - 2 tea spoons
Salt - To taste
Oil - 4 table spoons
Cumin Seeds - 1 table spoon


Method


Wash and pat dry the brinjals. Hold them from the head and make two perpendicular slits across the brinjal starting from bottom to top. Do not slice it off completely (the head with the stick should remain intact). Repeat the process for all the brinjals and keep aside. (do not leave for more than 5 min else the brinjals will turn brown).


Take a bowl. Add all the spices (except cumin seeds) and add two table spoons of oil. Mix well and make a paste out of it. Now fill this paste into the slits of each brinjal. Dont fill too much. I like to normally rub the spices mixture around the body of the each brinjal. This leaves a very thin film of spice on the brinjal making sure that the spices sieve in to the body of the aubergines.

Now take a pan. Heat two table spoons of oil and add the cumin seeds. Once the seeds are crackled, lay the brinjals (with spice mixture filled in it) in the pan carefully. Now cover the pan with a lid and cook on low flame for around 10 min.

Keep looking after every 2 min and turn the brinjals in all directions to ensure all sides get cooked, and none of the sides get burnt.

Finally when the brinjals are completely tender, we are done. Enjoy with chapatis, or rice. :)


Monday, February 13, 2012

Rawa Idli


Idli

Idli is a speciality of the southern part of India. It is easy to cook and is a very healthy dish. This is the staple diet for people in South India and is fondly cherished by people all over India as a delicacy. Idli can be eaten raw, with chutney, with sambhar, as upma or fried with onions/capsicum/tomatoes.

I have researched a lot on how to get the soft idlis, and here is the mix that I use.

Ingredients

For 28 Idli
1 bowl fine Rawa
1 and 1/2 bowl course Rawa
1 bowl yoghurt (natural)
1 teaspoon salt
1 teaspoon baking soda (please dont use baking powder. We need to use baking soda)
1 bowl luke warm water
1/2 tea spoon yeast
1 table spoon gunpowder (Gunpowder is a special South Indian spice made from a mix of dried lentils and other spices)

Method

Take a bowl and add 1 bowl of fine Rawa to it. Then add 1 and 1/2 bowl course Rawa. Add 1 teaspoon salt and 1 teaspoon baking soda. Add 1 cup natural yoghurt. Mix well.

Dissolve 1/2 teaspoon of yeast in 1 table spoon of luke warm water and mix the dissolved yeast to the above mix.

Finally add 1 bowl of luke warm water to the mix and mix well.

If you will cook the idlis in a Microwave, then keep a little extra water. If you will cook the idlis in a gas idli cooker, then keep the water little less.

Leave the mix to stand for 15-20 minutes.

After the batter is fermented for 15-20 minutes, mix well. Grease the Idli cooker (gas or Microwave). Add the Idlis to the stand. Cook the Idli at High setting of Microwave for 10 minutes. Should you use the gas pressure cooker, keep the flame at the highest and cook for 10 minutes.

In either case, ensure that the cooker has enough water at the bottom of the Idli stand, so that there is enough steam for the idlis to cook.

Tip: You can add roasted lentils like roasted chana daal to the Idli mix to add taste.


Saturday, February 11, 2012

Special Bengali Spices

Panch Phodan

This is a spice mixture that has its origin in the state of West Bengal. The spice mixture is not only very tasty, but also very healthy to use in all kinds of food. You can use it in daal, vegetables and curries.

Ingredients

1 table spoon Methi Dana
2 table spoon Jeera
1.5 table spoon Kalunjee (also known as Mangrel in some places)
1 table spoon Mustard Seeds
1 table spoon Saunf

Tip: Keep the spices mixed together and while making any curry, dal or vegetable, splatter the panch phodan in hot oil to start. Make sure that it doesnt burn.

Friday, February 10, 2012

Vegetarian Spaghetti


Spaghetti is a long, thin, cylindrical pasta of Italian origin. Spaghetti is made of semolina or flour and water. Italian dried spaghetti is made from durum wheat semolina, but outside of Italy it may be made with other kinds of flour. Traditionally, most spaghetti was 50 cm (20 in) long, but shorter lengths gained in popularity during the latter half of the 20th century and now spaghetti is most commonly available in 25–30 cm (10–12 in) lengths. A variety of pasta dishes are based on it, from spaghetti alla Carbonara or garlic and oil to a spaghetti with tomato sauce and other sauces.


For the dish today, we make a simple vegetarian spaghetti. Cooking time for the dish is 15 min. 


Ingredients


1/4 packet of spaghetti noodles
1 medium sized onion finely sliced in long thin slices
1/2 capsicum sliced finely in long shreds
1/2 cup chopped beans
2 table spoon soya sauce
1 table spoon vinegar
1.5 table spoon chilly sauce
1.5 table spoon tomato sauce
3 table spoon cooking oil
1 pan of water
salt and red pepper to taste


Method


Heat the 1 pan of water with 1/2 tea spoon salt and 1 table spoon of cooking oil. 
When the water has almost started to boil put the spaghetti in the water. I normally break the spaghetti noodles into half so that they are manageable. You can keep them in the length that you like. 


Boil the noodles nicely in the water and make sure that the spaghetti is completely cooked (else it will stay hard from the centre). When the spaghetti is done, drain it under cold water in a sieve and keep aside. I also like to wash the spaghetti noodles under cold water when they are boiled completely. This ensures that they don't get sticky. However make sure that the spaghetti is completely cooked up to the inside of each spaghetti noodle, else the cold water would make it hard from inside. Keep the drained and washed spaghetti aside and let the remaining water drain off. 


Now take a pan, and heat two table spoon of cooking oil. Add the onions and fry till translucent brown. Add the shredded capsicum and chopped beans to it, and stir fry for 3 minutes. Add 1.5 table spoon of chilly sauce and 1.5 table spoon of tomato sauce. Mix well. Don't fry too much else the mixture will become will very dry. Immediately add the 2 table spoons of soya sauce, 1 table spoon of vinegar and noodles. Mix all of these well. Add salt and red pepper as per taste. Mix well and let the noodles come to a uniform heat. Take care that the noodles dont get too dry. 


Serve hot. 


Tip: If you like more sour taste, increase the vinegar content by another 1/2 spoon. 

Thursday, February 9, 2012

Jalebi


Jalebi is a very popular Indian sweet dish, and is mostly used the 'Celebration Indian Sweet'. It is used across all major occassions like Holi, Republic Day, Independence Day and in many parts of India is eaten as breakfast every morning. Gwalior is famour for eating Jalebi and Poha as breakfast. Many people also enjoy eating jalebi dipped in milk.


Ingredients
1/2 cup whole purpose flour (maida)
1/2 teaspoon yeast
1/2 teaspoon gram flour
1/2 teaspoon sugar
1/2 teaspoon refined oil
1/2 cup luke warm water


For sugar syrup, we will need
1 cup sugar
1/2 cup water
1 table spoon lime juice
2- pinch of cardomom powder
1/4 teaspoon kesar


Method
First dissolve 1/2 teaspoon yeast in 1 tablespoon of luke warm water. Ensure that no lumps remain. Then add 1/2 cup of whole purpose flour (maida) to it. Add 1/2 teaspoon sugar, 1/2 teaspoon refined oil and 1/2 teaspoon gram flour and mix well. Ensure that there are no lumps formed in the batter.
Finally add a little less than 1/2 cup of water and make a smooth batter. The consistency of the batter should be similar to the batter we make for cakes.

Cover with a lid and leave in a warm place. The batter will ferment. Let it ferment for an hour. Dont over ferment the batter.

Make a cone (like the one used for putting henna) and keep the diameter of the mouth as about 3-4 mm.

After an hour, fill the fermented batter in the cone. Heat oil in a pan and when the oil is hot, make jalebis directly in the oil moving the cone in circular motions. Fry the jalebis till golden brown and set aside the fried jalebis on a tissue paper.

Meantime on another flame, take 1 cup of sugar in a pan and add 1/2 cup water. Add 1 table spoon lime juice, 2- pinch of cardomom powder and 1/4 teaspoon kesar to it. Bring it to a boil, and keep stiring. Ensure that the sugar does not burn. When the syrup become little thick remove it from flame.

Add the fried jalebis to the sugar syrup while it is hot. Delicately move around the jalebis in the sugar syrup so that all of them covered with the sugar syrup.

Serve hot or cold, as per taste.

Tip: Serve jalebis with poha and hot milk in the breakfast. This is a very wonderful and healthy breakfast. Many people eat Jalebi soaked in milk to treat headaches.


More Jalebi's :D